User guide
Introduction
GeneScreenReferenceFilesis a program that was developed to ease the creation of reference files for GeneScreen. The program imports data from a GenBank reference sequence file and then generates a GeneScreenreference file for each exon in the gene. There are a number of different GenBank reference file formats that contain different types of sequence data. To ease the use of GeneScreenReferenceFiles, it has been developed to use reference files that contain data for a single transcript and its resultant open reading frame. Example GenBank files used by GeneScreenReferenceFilescan be found here and here.
Obtaining a suitable GenBank reference file
A very large selection of GenBank reference files are available from the 'Gene' set of web pages (Figure 1), which is part of the NCBI web site (http://www.ncbi.nlm.nih.gov/gene). To search for a specific gene select 'Gene' from the options in the list (highlighted by the red rectangle in Figure 1), enter the gene's ID in the textbox (highlighted by the blue rectangle in Figure 1) and press the 'Search' button.
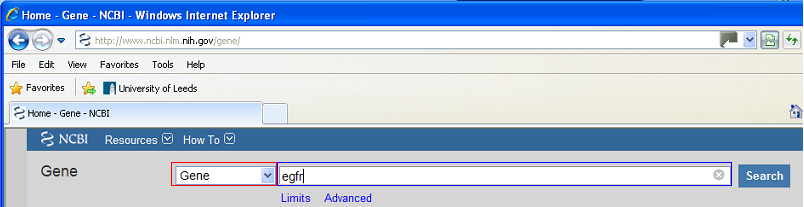
Figure 1: The Gene web site contains GenBank reference files for the majority of known genes
The search results are then displayed as a series of summaries for each hit, which identify the originating species for the specific sequence along with the genes chromosomal location and any aliases it has. To select a reference sequence click on the link at the start of the summary (highlighted by the red rectangle in Figure 2)
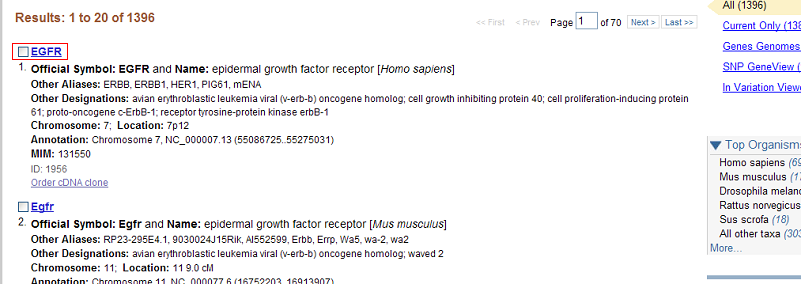
Figure 2: The search results are then displayed as a series of summaries for each hit.
Clicking on this link causes an interactive web page to be displayed that contains data on the relevant gene. Links to the GenBank reference files are found in the section. To find the correct GenBank file select the 'RefSeqGene' from the list (highlighted by the red rectangle in Figure 2) and then press the 'GenBank' link (highlighted by the blue rectangle in Figure 3).

Figure 3: To obtain the correct GenBank file first select the RefSeqGene option from the list and then select the GenBank link.
Finally, to download the GenBank reference file click on the and on the context menu (highlighted by the red rectangle in Figure 4) select the and options and press the button. This should cause the 'Download and Save as' dialog box to be displayed.
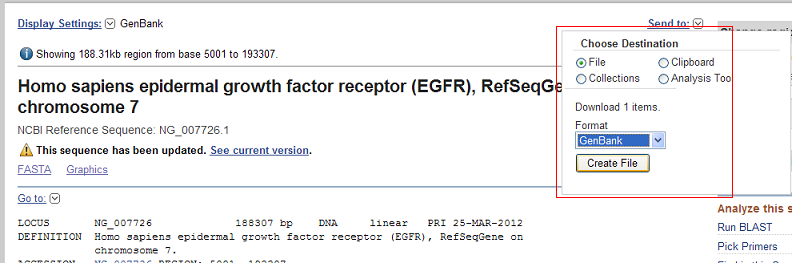
Figure 4: To download the GenBank file select file then GenBank from the options on the context menu.
Creating GeneScreen reference files
Important
If a GenBank file with multiple transcripts is imported, only the first transcript is shown/processed, also if this transcript is on the - strand the sequence will not be processed correctly. It is important to select files with only a single transcripts, if the gene has alternatively splices variants, download a GenBank file for each transcript.
To create GeneScreen reference files from a GenBank file, start GeneScreenReferenceFiles and select the GenBank file by pressing the button (Figure 1).
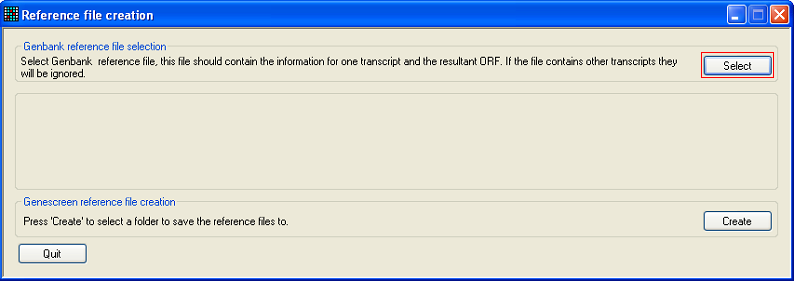
Figure 5: Press the button to import a GenBank file.
The exonic structure of the gene is shown in the central panel with the protein coding sequences shown above the mRNA encoding sequences. To create the GeneScreen reference files, press the button and select a folder to save them in. Each reference file will be named after the gene's ID and the exon's number (Figure 7).
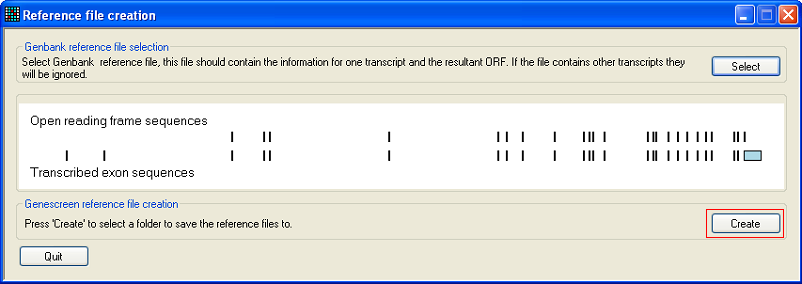
Figure 6: Press the button to export the GeneScreen reference files.
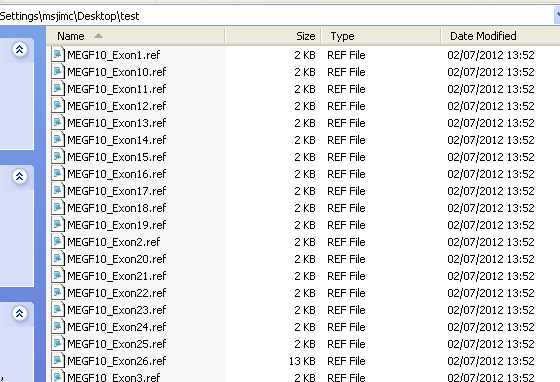
Figure 7: The GeneScreen reference files are named after the gene and the exon's number.